
TLS/SSL in the EIQ Product Suite
Configuring the EIQ Product Suite
TLS/SSL is used in applications to create secure communications over computer networks and inhibit eavesdropping. It is also used to ascertain the identity of the client at the other end of a connection.
The EIQ Product Suite uses OpenSSL to enable secure communications across server and client modules.
The following sections describe steps to enable TLS/SSL.
Self-generating SSL key and certificates
The first step is to download and install OpenSSL for Windows. Once installed, make sure the path to the .dll files are added to the %path% environment variable for the Windows user account.
Next, open the command prompt. Change the directory in the command prompt to the location of the OpenSSL installation. This is your working directory.
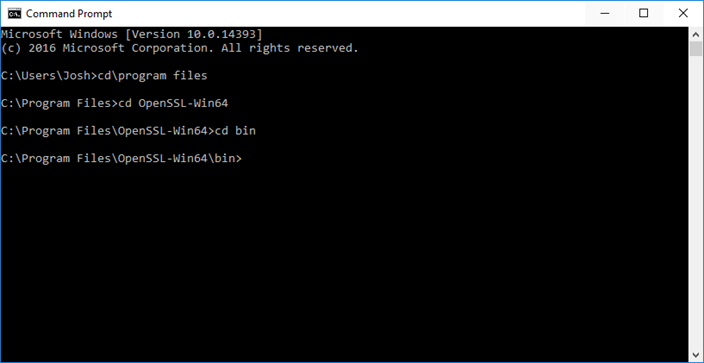
Now that the directory has been changed, use OpenSSL to generate a key and certificate.
Create a batch file (e.g., createCerts.bat) in the working directory with the following content:
openssl genrsa -out ca.key 2048
openssl req -new -x509 -key ca.key -out trusted.pem
openssl genrsa -out key.pem 2048
openssl req -new -key key.pem -out server.csr
openssl x509 -req -in server.csr -CA trusted.pem -CAkey ca.key -CAcreateserial -out cert.pem
openssl genrsa -out clientkey.pem 2048
openssl req -new -key clientkey.pem -out client.csr
openssl x509 -req -in client.csr -CA trusted.pem -CAkey ca.key -CAcreateserial -out clientcert.pem
Go to the working directory and run the batch file. There are 3 sets of similar questions, listed below, to answer. Answer the first set of questions based on the information for the Certification Authority (CA) (such as Verisign, but use your own makeup names). Answer the second and the third sets of questions based on the information for the organization running the EIQ Server and the organization running the EIQ Client respectively.
Note: Your actual answers to these questions will not affect the ability to run the EIQ Product Suite.
Country Name [US]
State or Province [TX]
Locality Name [Dallas]
Organization Name [WhamTech]
Organization Unit Name [Whatever you want, such as Development]
Common Name [Maybe your machine name]
Email Address [Enter an email address]
The output of the previous steps generates 5 files:
· key.pem
· cert.pem
· clientkey.pem
· clientcert.pem
· trusted.pem
The first 2 files (key.pem, cert.pem) strictly relate to the server. The next 2 files (clientkey.pem, clientcert.pem) strictly relate to the client. The trusted.pem file is needed both at the server and client side.
Create a subdirectory .eiq under user account's home directory ("C:\Users\USER_ACCOUNT\.eiq"), if it does not exist already.
If client is running on a different machine, create .eiq directory under user account's home directory on that machine as well. Copy clientkey.pem, clientcert.pem and trusted.pem files to .eiq directory on the client machine. Rename clientkey.pem to key and rename clientcert.pem to cert.pem.
If client and server programs are both running on the same machine, clientkey.pem and clientcert.pem are not needed, since the client is local to the server. In this case, just copy key.pem, cert.pem and trusted.pem to .eiq directory on server machine.
Restart/Start EIQ Server after making these changes.
Both the EIQ Server Query Tool and the EIQ Server Configuration Tool utilize an EIQ with SSL option. Launch the tools and select 'EIQ with SSL' instead of EIQ from the user type drop-down menu.
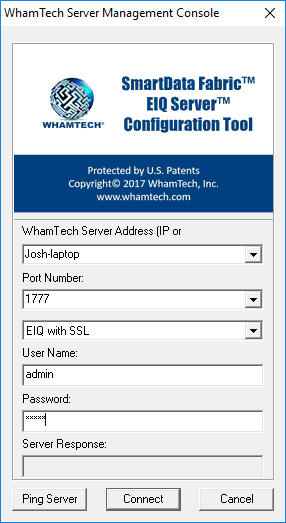
Figure 1: EIQ Server Configuration Tool using ‘EIQ with SSL’ to log in.

Figure 2: EIQ Server Query Tool using ‘EIQ with SSL’ to log in.
Copyright © 2019 , WhamTech, Inc. All rights reserved. This
document is provided for information purposes only and the contents hereof are
subject to change without notice. Names may be
trademarks of their respective owners.